Download Windows 10.MD-100.NewDumps.2021-03-15.144q.vcex
| Vendor: | Microsoft |
| Exam Code: | MD-100 |
| Exam Name: | Windows 10 |
| Date: | Mar 15, 2021 |
| File Size: | 16 MB |
How to open VCEX files?
Files with VCEX extension can be opened by ProfExam Simulator.
Discount: 20%

Demo Questions
Question 1
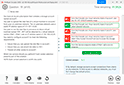
Please wait while the virtual machine loads. Once loaded, you may proceed to the lab section. This may take a few minutes, and the wait time will not be deducted from your overall test time.
When the Next button is available, click it to access the lab section. In this section, you will perform a set of tasks in a live environment. While most functionality will be available to you as it would be in a live environment, some functionality (e.g.,copy and paste, ability to navigate to external websites) will not be possible by design.
Scoring is based on the outcome of performing the tasks stated in the lab. In other words, it doesn’t matter how you accomplish the task, if you successfully perform it, you will earn credit for that task.
Labs are not timed separately, and this exam may more than one lab that you must complete. You can use as much time as you would like to complete each lab. But, you should manage your time appropriately to ensure that you are able to complete the lab(s) and all other sections of the exam in the time provided.
Please note that once you submit your work by clicking the Next button within a lab, you will NOT be able to return to the lab.
Username and password

Use the following login credentials as needed:
To enter your password, place your cursor in the Enter password box and click on the password below.
Username: Contoso/Administrator Password: Passw0rd!
The following information is for technical support purposes only:
Lab Instance: 11145882


Administrators report that they cannot use Event Viewer to remotely view the event logs on Client3.
You need to ensure that the administrators can access the event logs remotely on Client3. The solution must ensure that Windows Firewall remains enabled.
To complete this task, sign in to the required computer or computers.

Correct answer: A
Explanation:
1. Go to Control Panel -> System and Security -> Windows Firewall. 2. Click on the Advanced settings link in the left-hand side. 3. Enable COM+ Network Access (DCOM-In). 4. Enable all the rules in the Remote Event Log Management group. Reference:https://www.zubairalexander.com/blog/unable-to-access-event-viewer-on-a-remote-computer/ 1. Go to Control Panel -> System and Security -> Windows Firewall.
2. Click on the Advanced settings link in the left-hand side.

3. Enable COM+ Network Access (DCOM-In).

4. Enable all the rules in the Remote Event Log Management group.

Reference:
https://www.zubairalexander.com/blog/unable-to-access-event-viewer-on-a-remote-computer/
Question 2
Note: This question is part of a series of questions that present the same scenario. Each question in the series contains a unique solution that might meet the stated goals. Some question sets might have more than one correct solution, while others might not have a correct solution.
After you answer a question in this section, you will NOT be able to return to it. As a result, these questions will not appear in the review screen.
You manage devices that run Windows 10.
Ten sales users will travel to a location that has limited bandwidth that is expensive. The sales users will be at the location for three weeks.
You need to prevent all Windows updates from downloading for the duration of the trip. The solution must not prevent access to email and the Internet.
Solution: From Network & Internet in the Settings app, you set the network connections as metered connections.
Does this meet the goal?
- Yes
- No
Correct answer: A
Explanation:
References: https://www.makeuseof.com/tag/5-ways-temporarily-turn-off-windows-update-windows-10/ References: https://www.makeuseof.com/tag/5-ways-temporarily-turn-off-windows-update-windows-10/
Question 3
Your network contains an Active Directory domain. The domain contains a user named Admin1. All computers run Windows 10.
You enable Windows PowerShell remoting on the computers.
You need to ensure that Admin1 can establish remote PowerShell connections to the computers. The solution must use the principle of least privilege.
To which group should you add Admin1?
- Access Control Assistance Operators
- Power Users
- Remote Desktop Users
- Remote Management Users
Correct answer: D
Explanation:
References: https://4sysops.com/wiki/enable-powershell-remoting/ References: https://4sysops.com/wiki/enable-powershell-remoting/
Question 4
Note: This question is part of a series of questions that present the same scenario. Each question in the series contains a unique solution that might meet the stated goals. Some question sets might have more than one correct solution, while others might not have a correct solution.
After you answer a question in this section, you will NOT be able to return to it. As a result, these questions will not appear in the review screen.
Your network contains an Active Directory domain named contoso.com. The domain contains the users shown in the following table.

You have a computer named Computer1 that runs Windows 10 and is in a workgroup.
A local standard user on Computer1 named User1 joins the computer to the domain and uses the credentials of User2 when prompted.
You need to ensure that you can rename Computer1 as Computer33.
Solution: You use the credentials of User1 on Computer1.
Does this meet the goal?
- Yes
- No
Correct answer: B
Explanation:
Renaming a domain-joined computer will also rename the computer account in the domain. To do this, you need domain administrator privileges. User1 is a standard user. References: https://docs.microsoft.com/en-us/windows/security/identity-protection/access-control/active-directory-security-groups#bkmk-domainadmins Renaming a domain-joined computer will also rename the computer account in the domain. To do this, you need domain administrator privileges.
User1 is a standard user.
References: https://docs.microsoft.com/en-us/windows/security/identity-protection/access-control/active-directory-security-groups#bkmk-domainadmins
Question 5
Please wait while the virtual machine loads. Once loaded, you may proceed to the lab section. This may take a few minutes, and the wait time will not be deducted from your overall test time.
When the Next button is available, click it to access the lab section. In this section, you will perform a set of tasks in a live environment. While most functionality will be available to you as it would be in a live environment, some functionality (e.g., copy and paste, ability to navigate to external websites) will not be possible by design.
Scoring is based on the outcome of performing the tasks stated in the lab. In other words, it doesn’t matter how you accomplish the task, if you successfully perform it, you will earn credit for that task.
Labs are not timed separately, and this exam may more than one lab that you must complete. You can use as much time as you would like to complete each lab. But, you should manage your time appropriately to ensure that you are able to complete the lab(s) and all other sections of the exam in the time provided.
Please note that once you submit your work by clicking the Next button within a lab, you will NOT be able to return to the lab.
Username and password
Use the following login credentials as needed:
To enter your password, place your cursor in the Enter password box and click on the password below.
Username: Contoso/Administrator Password: Passw0rd!
The following information is for technical support purposes only:
Lab Instance: 10921597
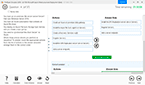
You need to create a user account named User5 on Client2. The solution must meet the following requirements:
- Prevent User5 from changing the password of the account.
- Ensure that User5 can perform backups. Use the principle of least privilege.
- To complete this task, sign in to the required computer or computers.
Correct answer: A
Explanation:
1. On Client2, press the Win + X keys on your keyboard. Then, click or tap the Computer Management option from the menu. 2. Expand the Local Users and Groups from the left side of the window, and select Users. 3. Right-click somewhere on the blank space found in the middle section of the window, and click or tap on New User. This opens the New User window, where you can enter all the details about the new user account. 4. Type the user name and, optionally, its full name and description. 5. Type the password to be used for that user and confirm it. 6. Select the User cannot change password check box. 7. Click Create and Windows immediately creates the user account. When you are done creating user accounts, click Close in the New User window. 1. Press the Win + R keys to open Run, type secpol.msc into Run, and click/tap on OK to open Local Security Policy. 2. Expand open Local Policies in the left pane of Local Security Policy, click/tap on User Rights Assignment, and double click/tap on the Back up files and directories policy in the right pane. 3. Click/tap on the Add User or Group button. 4. Click/tap on the Object Types button. 5. Check all the boxes for Object types, and click/tap on the OK. 6. Click/tap on the Advanced button. 7. Click/tap on the Find Now button, select the name of the user or group 8. Click/tap on OK. 9. Click/tap on OK. 10.When finished, you can close Local Users and Groups. Reference: https://www.digitalcitizen.life/geeks-way-creating-user-accounts-and-groups https://docs.microsoft.com/en-us/windows/security/threat-protection/security-policy-settings/user-rights-assignment 1. On Client2, press the Win + X keys on your keyboard. Then, click or tap the Computer Management option from the menu.
2. Expand the Local Users and Groups from the left side of the window, and select Users.
3. Right-click somewhere on the blank space found in the middle section of the window, and click or tap on New User. This opens the New User window, where you can enter all the details about the new user account.
4. Type the user name and, optionally, its full name and description.
5. Type the password to be used for that user and confirm it.
6. Select the User cannot change password check box.
7. Click Create and Windows immediately creates the user account. When you are done creating user accounts, click Close in the New User window.
1. Press the Win + R keys to open Run, type secpol.msc into Run, and click/tap on OK to open Local Security Policy.
2. Expand open Local Policies in the left pane of Local Security Policy, click/tap on User Rights Assignment, and double click/tap on the Back up files and directories policy in the right pane.
3. Click/tap on the Add User or Group button.
4. Click/tap on the Object Types button.
5. Check all the boxes for Object types, and click/tap on the OK.
6. Click/tap on the Advanced button.
7. Click/tap on the Find Now button, select the name of the user or group
8. Click/tap on OK.
9. Click/tap on OK.
10.When finished, you can close Local Users and Groups.
Reference: https://www.digitalcitizen.life/geeks-way-creating-user-accounts-and-groups https://docs.microsoft.com/en-us/windows/security/threat-protection/security-policy-settings/user-rights-assignment
Question 6
Note: This question is part of a series of questions that present the same scenario. Each question in the series contains a unique solution that might meet the stated goals. Some question sets might have more than one correct solution, while others might not have a correct solution.
After you answer a question in this section, you will NOT be able to return to it. As a result, these questions will not appear in the review screen. Your network contains an Active Directory domain named contoso.com. The domain contains the users shown in the
following table.

You have a computer named Computer1 that runs Windows 10 and is in a workgroup.
A local standard user on Computer1 named User1 joins the computer to the domain and uses the credentials of User2 when prompted.
You need to ensure that you can rename Computer1 as Computer33.
Solution: You use the credentials of User3 on Computer1.
Does this meet the goal?
- Yes
- No
Correct answer: A
Explanation:
Renaming a domain-joined computer will also rename the computer account in the domain. To do this, you need domain administrator privileges. User3 is a domain administrator. References: https://docs.microsoft.com/en-us/windows/security/identity-protection/access-control/active-directory-security-groups#bkmk-domainadmins Renaming a domain-joined computer will also rename the computer account in the domain. To do this, you need domain administrator privileges.
User3 is a domain administrator.
References: https://docs.microsoft.com/en-us/windows/security/identity-protection/access-control/active-directory-security-groups#bkmk-domainadmins
Question 7
Note: This question is part of a series of questions that present the same scenario. Each question in the series contains a unique solution that might meet the stated goals. Some question sets might have more than one correct solution, while others might not have a correct solution.
After you answer a question in this section, you will NOT be able to return to it. As a result, these questions will not appear in the review screen.
You have a computer named Computer1 that runs Windows 10.
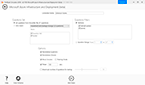
A service named Application1 is configured as shown in the exhibit.

You discover that a user used the Service1 account to sign in to Computer1 and deleted some files.
You need to ensure that the identity used by Application1 cannot be used by a user to sign in to sign in to the desktop on Computer1. The solution must use the principle of least privilege.
Solution: On Computer1, you assign Service1 the Deny log on as a service user right.
Does this meet the goal?
- Yes
- No
Correct answer: B
Explanation:
A service account needs the log on as a service user right. When you assign an account to be used by a service, that account is granted the log on as a service user right. Therefore, assigning Service1 the deny log on as a service user right would mean the service would not function. To sign in to the desktop on the computer, an account needs the log on locally right which all user accounts have by default. To meet the requirements of this question, we need to assign Service1 the deny log on locally user right, not the deny log on as a service user right. References: https://docs.microsoft.com/en-us/windows/security/threat-protection/security-policy-settings/deny-log-on-as-a-service A service account needs the log on as a service user right. When you assign an account to be used by a service, that account is granted the log on as a service user right. Therefore, assigning Service1 the deny log on as a service user right would mean the service would not function.
To sign in to the desktop on the computer, an account needs the log on locally right which all user accounts have by default.
To meet the requirements of this question, we need to assign Service1 the deny log on locally user right, not the deny log on as a service user right.
References: https://docs.microsoft.com/en-us/windows/security/threat-protection/security-policy-settings/deny-log-on-as-a-service
Question 8
You have a computer named LON-CL1.Adatum.com that runs Windows 10.
From Event Viewer, you create a custom view named View1 that has the following filter:
- User: User1
- Logged: Any time
- Event logs: System
- Computer: LON-CL1
- Event IDs: 10000 – 11000
- Event level: Error, Verbose
You open Event Viewer and discover the event shown in the exhibit. (Click the Exhibit tab.)

The event does not appear in View1.
You need to ensure that the event appears in View1.
What should you do?
- Add a Task Category setting to the filter.
- Add the computer account to the Event Log Readers group.
- Create an event subscription.
- Modify the Computer setting in the filter.
Correct answer: A
Explanation:
References: https://www.techrepublic.com/article/how-to-use-custom-views-in-windows-10s-event-viewer/ References: https://www.techrepublic.com/article/how-to-use-custom-views-in-windows-10s-event-viewer/
Question 9
Please wait while the virtual machine loads. Once loaded, you may proceed to the lab section. This may take a few minutes, and the wait time will not be deducted from your overall test time.
When the Next button is available, click it to access the lab section. In this section, you will perform a set of tasks in a live environment. While most functionality will be available to you as it would be in a live environment, some functionality (e.g., copy and paste, ability to navigate to external websites) will not be possible by design.
Scoring is based on the outcome of performing the tasks stated in the lab. In other words, it doesn’t matter how you accomplish the task, if you successfully perform it, you will earn credit for that task.
Labs are not timed separately, and this exam may more than one lab that you must complete. You can use as much time as you would like to complete each lab. But, you should manage your time appropriately to ensure that you are able to complete the lab(s) and all other sections of the exam in the time provided.
Please note that once you submit your work by clicking the Next button within a lab, you will NOT be able to return to the lab.
Username and password
Use the following login credentials as needed:
To enter your password, place your cursor in the Enter password box and click on the password below.
Username: Contoso/Administrator Password: Passw0rd!
The following information is for technical support purposes only:
Lab Instance: 11145882

You need to prevent user names and passwords from being filled in on forms automatically when a user browses to websites from Client2.
To complete this task, sign in to the required computer or computers.
Correct answer: A
Explanation:
1. Open the Local Group Policy Editor. 2. In the left pane of Local Group Policy Editor, navigate to Computer Configuration\Administrative Templates\Windows Components\Microsoft Edge 3. In the right pane of Microsoft Edge in Local Group Policy Editor, double click/tap on the Configure Autofill policy to edit it. 4. Select Disabled, click/tap on OK. 5. In the right pane of Microsoft Edge in Local Group Policy Editor, double click/tap on the 6. Configure Password Manager policy to edit it. 7. Select Disabled, click/tap on OK. 8. You can now close the Local Group Policy Editor. Reference: https://docs.microsoft.com/en-us/microsoft-edge/deploy/available-policies https://www.tenforums.com/tutorials/115069-enable-disable-autofill-microsoft-edge-windows-10-a.html 1. Open the Local Group Policy Editor.
2. In the left pane of Local Group Policy Editor, navigate to Computer Configuration\Administrative Templates\Windows Components\Microsoft Edge
3. In the right pane of Microsoft Edge in Local Group Policy Editor, double click/tap on the Configure Autofill policy to edit it.
4. Select Disabled, click/tap on OK.
5. In the right pane of Microsoft Edge in Local Group Policy Editor, double click/tap on the
6. Configure Password Manager policy to edit it.
7. Select Disabled, click/tap on OK.
8. You can now close the Local Group Policy Editor.
Reference: https://docs.microsoft.com/en-us/microsoft-edge/deploy/available-policies
https://www.tenforums.com/tutorials/115069-enable-disable-autofill-microsoft-edge-windows-10-a.html
Question 10
Note: This question is part of a series of questions that present the same scenario. Each question in the series contains a unique solution that might meet the stated goals. Some question sets might have more than one correct solution, while others might not have a correct solution.
After you answer a question in this section, you will NOT be able to return to it. As a result, these questions will not appear in the review screen.
A user named User2 has a computer named Computer2 that runs Windows 10. User2 joins Computer2 to contoso.com by using [email protected].
Computer1 contains a folder named Folder1. Folder1 is in drive C and is shared as Share1. Share1 has the permission shown in the following table.

A user named User2 has a computer named Computer2 that runs Windows 10. User2 joins Computer2 to contoso.com by using [email protected].
User2 attempts to access Share1 and receives the following error message: “The username or password is incorrect.”
You need to ensure that User2 can connect to Share1.
Solution: You create a local group on Computer1 and add the Guest account to the group. You grant the group Modify access to Share1.
Does this meet the goal?
- Yes
- No
Correct answer: B
HOW TO OPEN VCE FILES
Use VCE Exam Simulator to open VCE files
HOW TO OPEN VCEX AND EXAM FILES
Use ProfExam Simulator to open VCEX and EXAM files
ProfExam at a 20% markdown
You have the opportunity to purchase ProfExam at a 20% reduced price
Get Now!