Download Troubleshooting Microsoft Azure Connectivity.AZ-720.CertDumps.2023-07-14.20q.vcex
| Vendor: | Microsoft |
| Exam Code: | AZ-720 |
| Exam Name: | Troubleshooting Microsoft Azure Connectivity |
| Date: | Jul 14, 2023 |
| File Size: | 9 MB |
| Downloads: | 2 |
How to open VCEX files?
Files with VCEX extension can be opened by ProfExam Simulator.
Discount: 20%

Demo Questions
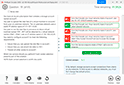
Question 1
You need to troubleshoot the CosmosDB1 issues from the on-premises environment. What should you use?
- route command
- Network Watcher next hop diagnostic tool
- Network Watcher Connection troubleshoot diagnostic tool
- nslookup command
Correct answer: C
Explanation:
This tool helps you troubleshoot network connectivity issues from a virtual machine to a given endpoint. It tests for reachability from the virtual machine to the endpoint and provides information about why a connection fails1. In this case, you can use this tool to troubleshoot the connectivity issues from the on-premises environment to CosmosDB1. This tool helps you troubleshoot network connectivity issues from a virtual machine to a given endpoint. It tests for reachability from the virtual machine to the endpoint and provides information about why a connection fails1. In this case,
you can use this tool to troubleshoot the connectivity issues from the on-premises environment to CosmosDB1.
Question 2
You need to resolve the issue with internet traffic from VM1 being routed directly to the internet.
What should you do?
- Modify IP address prefix of RT12
- Associate RT12 with Subnet1a.
- Associate RT12 with Subnet2a.
- Modify the next hop type of RT12.
Correct answer: B
Explanation:
This will ensure that the route table RT12, which has a route to direct internet traffic to the virtual network gateway VNG1, is applied to the subnet where VM1 is located. This will override the default route that sends internet traffic to the internet gateway. This will ensure that the route table RT12, which has a route to direct internet traffic to the virtual network gateway VNG1, is applied to the subnet where VM1 is located. This will override the default route that sends internet traffic to the internet gateway.
Question 3
You need to resolve the VM2 routing issue.
What should you do?
- Modify the IP configuration setting of the Azure network interface resource of VM1.
- Add a network interface to VM1.
- Add a network interface to VM2.
- Modify the IP configuration setting of the Azure network interface resource of VM2.
Correct answer: D
Explanation:
To resolve the VM2 routing issue, you should modify the IP configuration setting of the Azure network interface resource of VM2. This will ensure that VM2 can communicate with other resources in the virtual network. Troubleshooting connectivity problems between Azure VMs involves several steps such as checking whether NIC is misconfigured, whether network traffic is blocked by NSG or UDR, whether network traffic is blocked by VM firewall, whether VM app or service is listening on the port and whether the problem is caused by SNAT1. To resolve the VM2 routing issue, you should modify the IP configuration setting of the Azure network interface resource of VM2. This will ensure that VM2 can communicate with other resources in the virtual network.
Troubleshooting connectivity problems between Azure VMs involves several steps such as checking whether NIC is misconfigured, whether network traffic is blocked by NSG or UDR, whether network traffic is blocked by VM firewall, whether VM app or service is listening on the port and whether the problem is caused by SNAT1.
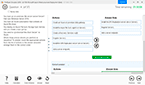
Question 4
You need to troubleshoot the Azure Key Vault issues.
What should you do? To answer, select the appropriate options in the answer area.
NOTE: Each correct selection is worth one point.
Correct answer: To work with this question, an Exam Simulator is required.
Explanation:
Box 1: Key Vault transaction limit.Based on the given scenario, the issue is related to the number of transactions per second (TPS) being throttled. The Azure Key Vault has a transaction limit, which varies depending on the service tier. In the provided images, the error message states that the request rate is too large, indicating that the transaction limit has been reached. To resolve this issue, you can either distribute the transactions over a longer period, implement a retry policy, or consider upgrading to a higher service tier if the current tier's transaction limit is insufficient for your needs. Reference:https://docs.microsoft.com/en-us/azure/key-vault/general/service-limitsBox : 2 Distribute requests across additional Azure Key vaultsIn the provided scenario, the issue is that the Azure Key Vault is experiencing throttling due to toomanyrequests per second. Throttling occurs when the number of requests exceeds the allowedlimits for a given time period. To resolve this issue, you should distribute the requests acrossadditional Azure Key Vaults. By doing so, you can balance the load and prevent exceeding the requestlimits, thus avoiding throttling. Reference: https://docs.microsoft.com/en-us/azure/keyvault/general/overview-throttling Box 1: Key Vault transaction limit.
Based on the given scenario, the issue is related to the number of transactions per second (TPS) being throttled. The Azure Key Vault has a transaction limit, which varies depending on the service tier. In the provided images, the error
message states that the request rate is too large, indicating that the transaction limit has been reached. To resolve this issue, you can either distribute the transactions over a longer period, implement a retry policy, or consider upgrading to
a higher service tier if the current tier's transaction limit is insufficient for your needs. Reference:
https://docs.microsoft.com/en-us/azure/key-vault/general/service-limitsBox : 2 Distribute requests across additional Azure Key vaultsIn the provided scenario, the issue is that the Azure Key Vault is experiencing throttling due to toomany
requests per second. Throttling occurs when the number of requests exceeds the allowedlimits for a given time period. To resolve this issue, you should distribute the requests acrossadditional Azure Key Vaults. By doing so, you can
balance the load and prevent exceeding the requestlimits, thus avoiding throttling. Reference: https://docs.microsoft.com/en-us/azure/keyvault/general/overview-throttling
Question 5
You need to troubleshoot the sales department issues.
How should you configure the system? To answer, select the appropriate options in the answer area.
NOTE: Each correct selection is worth one point.
Correct answer: To work with this question, an Exam Simulator is required.
Explanation:
Box 1: Subject name of the root certificate.This is the value that should be configured as the system Remote ID for the VPN client on the sales department devices. The system Remote ID is used to identify the VPN server that the client is connecting to, and it must match the value that is configured on the VPN gateway in Azure. For Azure VPN Gateway, the system Remote ID is the subject name of the root certificate that is used for authentication1. Therefore, option C is correct. A detailed explanation with references is as follows:As mentioned in the scenario, the sales department devices are using Point-to-Site VPN connections to access Azure resources. A Point-to-Site VPN connection lets you create a secure connection to your virtual network from an individual client computer2. To configure a Point-to-Site VPN connection, you need to create a virtual network gateway of type VPN in Azure, and then install a VPN client on each device that needs to connect2. The VPN client configuration includes several settings, such as the VPN server address, the tunnel type, and the authentication method. One of these settings is the system Remote ID, which is used to identify the VPN server that the client is connecting to1. The system Remote ID must match the value that is configured on the VPN gateway in Azure, otherwise the connection will fail. For Azure VPN Gateway, there are three authentication methods available for Point-to-Site VPN connections: certificate-based authentication, OpenVPN with Azure AD authentication, and OpenVPN with certificate-based authentication2.For certificate-based authentication, which is used in this scenario, the system Remote ID is the subject name of the root certificate that is used for authentication1. The root certificate is uploaded to Azure when creating a Point-to-Site VPN connection, and it must be installed on each device that needs to connect2. The subject name of the root certificate can be obtained by using PowerShell or OpenSSL commands1. For example, using PowerShell:$cert = Get-ChildItem -Path Cert:\CurrentUser\My | Where-Object {$_.Subject -like “ContosoRootCert”} $cert.Subject The output of this command will show the subject name of the root certificate that matches ContosoRootCert. This valueshould be configured as the system Remote ID for the VPN client on each device. Box 2: Subject name of the client certificate
In the provided scenario, the sales department is using a VPN to connect to the corporate network, and the VPN server is configured to use certificate-based authentication. To troubleshoot the sales department issues, you should configure the system Local ID to use the subject name of the client certificate. The subject name of a client certificate uniquely identifies the client and is used during the certificate-based authentication process. This allows the VPN server to verify the client's identity and grant access to the corporate network. This is the value that should be configured as the system Local ID for the VPN client on the sales department devices. The system Local ID is used to identify the VPN client that is connecting to the VPN server, and it must match the value that is configured on the VPN gateway in Azure. For Azure VPN Gateway, the system Local ID is the subject name of the client certificate that is used for authentication1. Therefore, option A is correct. A detailed explanation with references is as follows:As mentioned in the scenario, the sales department devices are using Point-to-Site VPN connections to access Azure resources. A Point-to-Site VPN connection lets you create a secure connection to your virtual network from an individual client computer2. To configure a Point-to-Site VPN connection, you need to create a virtual network gateway of type VPN in Azure, and then install a VPN client on each device that needs to connect2. The VPN client configuration includes several settings, such as the VPN server address, the tunnel type, and the authentication method. One of these settings is the system Local ID, which is used to identify the VPN client that is connecting to the VPN server1. The system Local ID must match the value that is configured on the VPN gateway in Azure, otherwise the connection will fail. For Azure VPN Gateway, there are three authentication methods available for Point-to-Site VPN connections: certificate-based authentication, OpenVPN with Azure AD authentication, and OpenVPN with certificate-based authentication2.For certificate-based authentication, which is used in this scenario, the system Local ID is the subject name of the client certificate that is used for authentication1. The client certificate is generated from a root certificate that is uploaded to Azure when creating a Point-to-Site VPN connection, and it must be installed on each device that needs to connect2. The subject name of the client certificate can be obtained by using PowerShell or OpenSSL commands1. For example, using PowerShell:$cert = Get-ChildItem -Path Cert:\CurrentUser\My | Where-Object {$_.Subject -like “ContosoClientCert”} $cert.Subject The output of this command will show the subject name of the client certificate that matches ContosoClientCert. This value should be configured as the system Local ID for the VPN client on each device. Box 1: Subject name of the root certificate.
This is the value that should be configured as the system Remote ID for the VPN client on the sales department devices. The system Remote ID is used to identify the VPN server that the client is connecting to, and it must match the value that is configured on the VPN gateway in Azure. For Azure VPN Gateway, the system Remote ID is the subject name of the root certificate that is used for authentication1. Therefore, option C is correct.
A detailed explanation with references is as follows:
As mentioned in the scenario, the sales department devices are using Point-to-Site VPN connections to access Azure resources. A Point-to-Site VPN connection lets you create a secure connection to your virtual network from an individual client computer2. To configure a Point-to-Site VPN connection, you need to create a virtual network gateway of type VPN in Azure, and then install a VPN client on each device that needs to connect2. The VPN client configuration includes several settings, such as the VPN server address, the tunnel type, and the authentication method. One of these settings is the system Remote ID, which is used to identify the VPN server that the client is connecting to1. The system Remote ID must match the value that is configured on the VPN gateway in Azure, otherwise the connection will fail.
For Azure VPN Gateway, there are three authentication methods available for Point-to-Site VPN connections: certificate-based authentication, OpenVPN with Azure AD authentication, and OpenVPN with certificate-based authentication2.
For certificate-based authentication, which is used in this scenario, the system Remote ID is the subject name of the root certificate that is used for authentication1. The root certificate is uploaded to Azure when creating a Point-to-Site VPN connection, and it must be installed on each device that needs to connect2. The subject name of the root certificate can be obtained by using PowerShell or OpenSSL commands1. For example, using PowerShell:
$cert = Get-ChildItem -Path Cert:\CurrentUser\My | Where-Object {$_.Subject -like “ContosoRootCert”} $cert.Subject The output of this command will show the subject name of the root certificate that matches ContosoRootCert. This valueshould be configured as the system Remote ID for the VPN client on each device.
Box 2: Subject name of the client certificate
In the provided scenario, the sales department is using a VPN to connect to the corporate network, and the VPN server is configured to use certificate-based authentication. To troubleshoot the sales department issues, you should configure the system Local ID to use the subject name of the client certificate. The subject name of a client certificate uniquely identifies the client and is used during the certificate-based authentication process. This allows the VPN server to verify the client's identity and grant access to the corporate network.
This is the value that should be configured as the system Local ID for the VPN client on the sales department devices. The system Local ID is used to identify the VPN client that is connecting to the VPN server, and it must match the value that is configured on the VPN gateway in Azure. For Azure VPN Gateway, the system Local ID is the subject name of the client certificate that is used for authentication1. Therefore, option A is correct.
A detailed explanation with references is as follows:
As mentioned in the scenario, the sales department devices are using Point-to-Site VPN connections to access Azure resources. A Point-to-Site VPN connection lets you create a secure connection to your virtual network from an individual client computer2. To configure a Point-to-Site VPN connection, you need to create a virtual network gateway of type VPN in Azure, and then install a VPN client on each device that needs to connect2. The VPN client configuration includes several settings, such as the VPN server address, the tunnel type, and the authentication method. One of these settings is the system Local ID, which is used to identify the VPN client that is connecting to the VPN server1. The system Local ID must match the value that is configured on the VPN gateway in Azure, otherwise the connection will fail.
For Azure VPN Gateway, there are three authentication methods available for Point-to-Site VPN connections: certificate-based authentication, OpenVPN with Azure AD authentication, and OpenVPN with certificate-based authentication2.
For certificate-based authentication, which is used in this scenario, the system Local ID is the subject name of the client certificate that is used for authentication1. The client certificate is generated from a root certificate that is uploaded to Azure when creating a Point-to-Site VPN connection, and it must be installed on each device that needs to connect2. The subject name of the client certificate can be obtained by using PowerShell or OpenSSL commands1. For example, using PowerShell:
$cert = Get-ChildItem -Path Cert:\CurrentUser\My | Where-Object {$_.Subject -like “ContosoClientCert”} $cert.Subject The output of this command will show the subject name of the client certificate that matches ContosoClientCert. This value should be configured as the system Local ID for the VPN client on each device.
Question 6
You need to resolve the Azure virtual machine (VM) deployment issues.
What should you do? To answer, select the appropriate options in the answer area.
NOTE: Each correct selection is worth one point.
Correct answer: To work with this question, an Exam Simulator is required.
Explanation:
Box 1: Enable access to Azure Resource Manager for template deployment.In the given scenario, you are trying to resolve Azure VM deployment issues. To configure an Azure Key Vault access policy setting for VM deployment, you need to enable access to Azure Resource Manager for template deployment. This will allow the VM deployment process to access the secrets and certificates stored in the Key Vault during the deployment of the VM using an ARM (Azure Resource Manager) template. Reference: - https://docs.microsoft.com/en-us/azure/keyvault/ general/tutorial-net-create-vault-azure-web-app Box 2: Grant the Microsoft.KeyVault/vaults/deploy/action permissionThis is the permission that you should configure on an RBAC Key Vault role to resolve the Azure virtual machine (VM) deployment issues. This permission allows Azure Resource Manager to retrieve secrets from the key vault when deploying resources using an ARM template1. Therefore, option C is correct. A detailed explanation with references is as follows:
As mentioned in the scenario, the Azure virtual machine (VM) deployment issues are caused by the inability of Azure Resource Manager to retrieve secrets from the key vault when deploying resources using an ARM template. To resolve this issue, you need to configure an RBAC Key Vault role that grants Azure Resource Manager the permission to access the key vault. RBAC Key Vault roles are roles that can be assigned to users, groups, or applications to manage access to key vault secrets, keys, and certificates2. RBAC Key Vault roles are based on Azure rolebased access control (Azure RBAC), which is an authorization system that provides fine-grained access management of Azure resources3. With Azure RBAC, you can control access to resources by creating role assignments, which consist of three elements3:The security principal: The user, group, or application that you want to grant or deny access to the resource.The role definition: The predefined or custom set of permissions that you want to grant or deny on the resource. For example, read, write, delete, backup, restore, etc.The scope: The level at which you want to apply the role assignment. For example, at the management group, subscription, resource group, or individual resource level.To configure a role assignment that allows Azure Resource Manager to retrieve secrets from the key vault when deploying resources using an ARM template, you need to grant the Microsoft.KeyVault/vaults/deploy/action permission1. This is a special permission that grants Azure Resource Manager a limited permission to get secrets from the key vault during resource deployment1. This permission does not grant any other permissions to Azure Resource Manager on the key vault or its contents1. To grant the Microsoft.KeyVault/vaults/deploy/action permission using the Azure portal, follow these steps1:In the Azure portal, navigate to the Key Vault resource. Select Access control (IAM), then select Add > Add role assignment. Under Role, select a built-in or custom role that includes the Microsoft.KeyVault/vaults/deploy/action permission. For example, you can select Key Vault Administrator or Key Vault Secrets User. Under Assign access to, select Azure AD user, group, or service principal. Under Select, enter Azure Resource Manager in the search field and select it. Select Save to create the role assignment. To grant the Microsoft.KeyVault/vaults/deploy/action permission using the Azure CLI or PowerShell, see Grant permissions for template deployment. Box 1: Enable access to Azure Resource Manager for template deployment.
In the given scenario, you are trying to resolve Azure VM deployment issues. To configure an Azure Key Vault access policy setting for VM deployment, you need to enable access to Azure Resource Manager for template deployment. This will allow the VM deployment process to access the secrets and certificates stored in the Key Vault during the deployment of the VM using an ARM (Azure Resource Manager) template. Reference: - https://docs.microsoft.com/en-us/azure/keyvault/ general/tutorial-net-create-vault-azure-web-app
Box 2: Grant the Microsoft.KeyVault/vaults/deploy/action permission
This is the permission that you should configure on an RBAC Key Vault role to resolve the Azure virtual machine (VM) deployment issues. This permission allows Azure Resource Manager to retrieve secrets from the key vault when deploying resources using an ARM template1. Therefore, option C is correct.
A detailed explanation with references is as follows:
As mentioned in the scenario, the Azure virtual machine (VM) deployment issues are caused by the inability of Azure Resource Manager to retrieve secrets from the key vault when deploying resources using an ARM template. To resolve this issue, you need to configure an RBAC Key Vault role that grants Azure Resource Manager the permission to access the key vault.
RBAC Key Vault roles are roles that can be assigned to users, groups, or applications to manage access to key vault secrets, keys, and certificates2. RBAC Key Vault roles are based on Azure rolebased access control (Azure RBAC), which is an authorization system that provides fine-grained access management of Azure resources3. With Azure RBAC, you can control access to resources by creating role assignments, which consist of three elements3:
The security principal: The user, group, or application that you want to grant or deny access to the resource.
The role definition: The predefined or custom set of permissions that you want to grant or deny on the resource. For example, read, write, delete, backup, restore, etc.
The scope: The level at which you want to apply the role assignment. For example, at the management group, subscription, resource group, or individual resource level.
To configure a role assignment that allows Azure Resource Manager to retrieve secrets from the key vault when deploying resources using an ARM template, you need to grant the Microsoft.KeyVault/vaults/deploy/action permission1. This is a special permission that grants Azure Resource Manager a limited permission to get secrets from the key vault during resource deployment1. This permission does not grant any other permissions to Azure Resource Manager on the key vault or its contents1.
To grant the Microsoft.KeyVault/vaults/deploy/action permission using the Azure portal, follow these steps1:
In the Azure portal, navigate to the Key Vault resource.
Select Access control (IAM), then select Add > Add role assignment.
Under Role, select a built-in or custom role that includes the
Microsoft.KeyVault/vaults/deploy/action permission. For example, you can select Key Vault Administrator or Key Vault Secrets User.
Under Assign access to, select Azure AD user, group, or service principal.
Under Select, enter Azure Resource Manager in the search field and select it.
Select Save to create the role assignment.
To grant the Microsoft.KeyVault/vaults/deploy/action permission using the Azure CLI or PowerShell, see Grant permissions for template deployment.
Question 7
You need to troubleshoot and resolve issues reported for contosostorage1.
What should you do? To answer, select the appropriate option in the answer area.
NOTE: Each correct selection is worth one point.
Correct answer: To work with this question, an Exam Simulator is required.
Explanation:
Box 1: Configure service endpoint for subnet on VNet2 and VNet3.This is what you should do to resolve issues accessing contosostorage1 from VNet2 and VNet3. A service endpoint is a feature that enables you to secure your Azure Storage account to a specific virtual network subnet1. As mentioned in the scenario, contosostorage1 is a storage account that has firewall and virtual network settings enabled. This means that only requests from allowed networks can access the storage account2. By default, storage accounts accept connections from clients on any network, but you can configure firewall rules to allow or deny access based on the source IP address or virtual network subnet2. In this scenario, you want to allow access to contosostorage1 from VNet2 and VNet3, which are peered with VNet1. To do this, you need to configure service endpoints for the subnets on VNet2 and VNet3 that need to access the storage account1. A service endpoint is a feature that enables you to secure your Azure Storage account to a specific virtual network subnet1. When you enable a service endpoint for a subnet, you can then grant access to the storage account only from that subnet1. This way, you can restrict access to your storage account and improve network performance by routing traffic through an optimal path. To configure service endpoints for a subnet using the Azure portal, follow these steps1:In the Azure portal, navigate to the Virtual Network resource. Select Subnets, then select the subnet that needs to access the storage account. Under Service endpoints, select Microsoft.Storage from the drop-down list. Select Save to apply the changes. To configure service endpoints for a subnet using the Azure CLI or PowerShell, see Enable a service endpoint. After configuring service endpoints for the subnets on VNet2 and VNet3, you also need to grant access to contosostorage1 from those subnets. To do this, you need to modify the firewall rules on the storage account2. To modify the firewall rules on the storage account using the Azure portal, follow these steps2:In the Azure portal, navigate to the Storage Account resource. Select Firewalls and virtual networks under Settings. Under Allow access from selected networks, select Add existing virtual network. Select the virtual network and subnet that have service endpoints enabled for Microsoft.Storage. Select Add to save the changes. To modify the firewall rules on the storage account using the Azure CLI or PowerShell, see Configure Azure Storage firewalls and virtual networks. Box 2: Configure the firewall settings on contosostorage1.The issue reported is that on-premises connections to contosostorage1 are unsuccessful. The main reason for this could be that the firewall settings on the storage account are blocking the connections. By configuring the firewall settings on contosostorage1 to allow the on-premises IP addresses, you can ensure that the on-premises connections are successful. As mentioned in the scenario, contosostorage1 is a storage account that has firewall and virtual network settings enabled. This means that only requests from allowed networks can access the storage account1. By default, storage accounts accept connections from clients on any network, but you can configure firewall rules to allow or deny access based on the source IP address or virtual network subnet1. In this scenario, you want to allow access to contosostorage1 from the on-premises environment, which is connected to Azure using a Site-to-Site VPN connection. A Site-to-Site VPN connection lets you create a secure connection between your on-premises network and an Azure virtual network over an IPsec/IKE VPN tunnel2. To allow access to contosostorage1 from the on-premises environment, you need to configure the firewall settings on contosostorage1 to include the public IP address of your VPN device or gateway3. To configure the firewall settings on contosostorage1 using the Azure portal, follow these steps1:In the Azure portal, navigate to the Storage Account resource. Select Firewalls and virtual networks under Settings. Under Allow access from selected networks, select Add existing virtual network. Select VNet1 and the subnet that has service endpoints enabled for Microsoft.Storage. Under Firewall, enter the public IP address of your VPN device or gateway under Address Range. Select Save to apply the changes. To configure the firewall settings on contosostorage1 using the Azure CLI or PowerShell, see Configure Azure Storage firewalls and virtual networks. Box 1: Configure service endpoint for subnet on VNet2 and VNet3.
This is what you should do to resolve issues accessing contosostorage1 from VNet2 and VNet3. A service endpoint is a feature that enables you to secure your Azure Storage account to a specific virtual network subnet1.
As mentioned in the scenario, contosostorage1 is a storage account that has firewall and virtual network settings enabled. This means that only requests from allowed networks can access the storage account2. By default, storage accounts accept connections from clients on any network, but you can configure firewall rules to allow or deny access based on the source IP address or virtual network subnet2.
In this scenario, you want to allow access to contosostorage1 from VNet2 and VNet3, which are peered with VNet1. To do this, you need to configure service endpoints for the subnets on VNet2 and VNet3 that need to access the storage account1. A service endpoint is a feature that enables you to secure your Azure Storage account to a specific virtual network subnet1. When you enable a service endpoint for a subnet, you can then grant access to the storage account only from that subnet1. This way, you can restrict access to your storage account and improve network performance by routing traffic through an optimal path.
To configure service endpoints for a subnet using the Azure portal, follow these steps1:
In the Azure portal, navigate to the Virtual Network resource.
Select Subnets, then select the subnet that needs to access the storage account.
Under Service endpoints, select Microsoft.Storage from the drop-down list.
Select Save to apply the changes.
To configure service endpoints for a subnet using the Azure CLI or PowerShell, see Enable a service endpoint.
After configuring service endpoints for the subnets on VNet2 and VNet3, you also need to grant access to contosostorage1 from those subnets. To do this, you need to modify the firewall rules on the storage account2.
To modify the firewall rules on the storage account using the Azure portal, follow these steps2:
In the Azure portal, navigate to the Storage Account resource.
Select Firewalls and virtual networks under Settings.
Under Allow access from selected networks, select Add existing virtual network.
Select the virtual network and subnet that have service endpoints enabled for Microsoft.Storage.
Select Add to save the changes.
To modify the firewall rules on the storage account using the Azure CLI or PowerShell, see Configure Azure Storage firewalls and virtual networks.
Box 2: Configure the firewall settings on contosostorage1.
The issue reported is that on-premises connections to contosostorage1 are unsuccessful. The main reason for this could be that the firewall settings on the storage account are blocking the connections. By configuring the firewall settings on contosostorage1 to allow the on-premises IP addresses, you can ensure that the on-premises connections are successful.
As mentioned in the scenario, contosostorage1 is a storage account that has firewall and virtual network settings enabled. This means that only requests from allowed networks can access the storage account1. By default, storage accounts accept connections from clients on any network, but you can configure firewall rules to allow or deny access based on the source IP address or virtual network subnet1.
In this scenario, you want to allow access to contosostorage1 from the on-premises environment, which is connected to Azure using a Site-to-Site VPN connection. A Site-to-Site VPN connection lets you create a secure connection between your on-premises network and an Azure virtual network over an IPsec/IKE VPN tunnel2. To allow access to contosostorage1 from the on-premises environment, you need to configure the firewall settings on contosostorage1 to include the public IP address of your VPN device or gateway3.
To configure the firewall settings on contosostorage1 using the Azure portal, follow these steps1:
In the Azure portal, navigate to the Storage Account resource.
Select Firewalls and virtual networks under Settings.
Under Allow access from selected networks, select Add existing virtual network.
Select VNet1 and the subnet that has service endpoints enabled for Microsoft.Storage.
Under Firewall, enter the public IP address of your VPN device or gateway under Address Range.
Select Save to apply the changes.
To configure the firewall settings on contosostorage1 using the Azure CLI or PowerShell, see Configure Azure Storage firewalls and virtual networks.
Question 8
You need to resolve the issue.
What should you do? To answer, select the appropriate options in the answer area.
NOTE: Each correct selection is worth one point.
Correct answer: To work with this question, an Exam Simulator is required.
Explanation:
Box 1: Assign the Contributor role to the team members.In the given scenario, the team members are unable to create or manage resources in the Azure portal. To allow them to do so, you should assign the Contributor role to the team members. The Contributor role allows users to create and manage resources within the scope of their access, but they cannot grant access to others. The Reader role only provides read access to resources and does not allow creation or management of resources. The Reader and Data Access role is not a valid combined role in Azure. Reference: - Azure built-in roles: https://docs.microsoft.com/enus/ azure/role-based-access-control/built-in-roles As mentioned in the scenario, the team members are unable to create resources in Azure Portal. This indicates that they do not have sufficient permissions to perform this operation. To grant them permissions, you need to assign them an Azure role that allows creating and managing Azure resources. Azure roles are roles that can be assigned to users, groups, or applications to manage access to Azure resources1. Azure roles are based on Azure role-based access control (Azure RBAC), which is an authorization system that provides fine-grained access management of Azure resources2. With Azure RBAC, you can control access to resources by creating role assignments, which consist of three elements2:The security principal: The user, group, or application that you want to grant or deny access to the resource.The role definition: The predefined or custom set of permissions that you want to grant or deny on the resource. For example, read, write, delete, backup, restore, etc.The scope: The level at which you want to apply the role assignment. For example, at the management group, subscription, resource group, or individual resource level.To assign an Azure role that allows creating and managing Azure resources, you can use the Contributor role. The Contributor role is a built-in role that has full access to all resources except granting access to others1. This means that users who are assigned the Contributor role can create and manage any type of Azure resource, such as virtual machines, storage accounts, web apps, etc. To assign the Contributor role using the Azure portal, follow these steps3:In the Azure portal, navigate to the scope where you want to assign the role. For example, a subscription or a resource group. Select Access control (IAM), then select Add > Add role assignment. Under Role, select Contributor from the drop-down list. Under Assign access to, select User, group, or service principal. Under Select, find and select the users or groups that you want to assign the role to. You can type in the Select box to search the directory for display name or email address. Select Save to create the role assignment. To assign the Contributor role using the Azure CLI or PowerShell, see Assign Azure roles using CLI or PowerShell. Box 2: Assign the Storage Blob Data Contributor role to the team members.A detailed explanation with references is as follows:As mentioned in the scenario, the team members are unable to perform backups and restores of blob dat a. This indicates that they do not have sufficient permissions to access blob storage resources. To grant them permissions, you need to assign them an Azure role that allows read/write/delete permissions to blob storage resources. Azure roles are roles that can be assigned to users, groups, or applications to manage access to Azure resources2. Azure roles are based on Azure role-based access control (Azure RBAC), which is an authorization system that provides fine-grained access management of Azure resources3. With Azure RBAC, you can control access to resources by creating role assignments, which consist of three elements3:The security principal: The user, group, or application that you want to grant or deny access to the resource.The role definition: The predefined or custom set of permissions that you want to grant or deny on the resource. For example, read, write, delete, backup, restore, etc.The scope: The level at which you want to apply the role assignment. For example, at the management group, subscription, resource group, or individual resource level.To assign an Azure role that allows read/write/delete permissions to blob storage resources, you can use the Storage Blob Data Contributor role. The Storage Blob Data Contributor role is a built-in role that has full access to blob storage resources except granting access to others1. This means that users who are assigned the Storage Blob Data Contributor role can perform backups and restores of blob data. To assign the Storage Blob Data Contributor role using the Azure portal, follow these steps4:In the Azure portal, navigate to the scope where you want to assign the role. For example, a storage account or a container. Select Access control (IAM), then select Add > Add role assignment. Under Role, select Storage Blob Data Contributor from the drop-down list. Under Assign access to, select User, group, or service principal. Under Select, find and select the users or groups that you want to assign the role to. You can type in the Select box to search the directory for display name or email address. Select Save to create the role assignment. To assign the Storage Blob Data Contributor role using the Azure CLI or PowerShell, see Assign Azure roles using CLI or PowerShell. Box 1: Assign the Contributor role to the team members.
In the given scenario, the team members are unable to create or manage resources in the Azure portal. To allow them to do so, you should assign the Contributor role to the team members. The Contributor role allows users to create and manage resources within the scope of their access, but they cannot grant access to others. The Reader role only provides read access to resources and does not allow creation or management of resources. The Reader and Data Access role is not a valid combined role in Azure. Reference: - Azure built-in roles: https://docs.microsoft.com/enus/ azure/role-based-access-control/built-in-roles As mentioned in the scenario, the team members are unable to create resources in Azure Portal. This indicates that they do not have sufficient permissions to perform this operation. To grant them permissions, you need to assign them an Azure role that allows creating and managing Azure resources.
Azure roles are roles that can be assigned to users, groups, or applications to manage access to Azure resources1. Azure roles are based on Azure role-based access control (Azure RBAC), which is an authorization system that provides fine-grained access management of Azure resources2. With Azure RBAC, you can control access to resources by creating role assignments, which consist of three elements2:
The security principal: The user, group, or application that you want to grant or deny access to the resource.
The role definition: The predefined or custom set of permissions that you want to grant or deny on the resource. For example, read, write, delete, backup, restore, etc.
The scope: The level at which you want to apply the role assignment. For example, at the management group, subscription, resource group, or individual resource level.
To assign an Azure role that allows creating and managing Azure resources, you can use the Contributor role. The Contributor role is a built-in role that has full access to all resources except granting access to others1. This means that users who are assigned the Contributor role can create and manage any type of Azure resource, such as virtual machines, storage accounts, web apps, etc.
To assign the Contributor role using the Azure portal, follow these steps3:
In the Azure portal, navigate to the scope where you want to assign the role. For example, a subscription or a resource group.
Select Access control (IAM), then select Add > Add role assignment.
Under Role, select Contributor from the drop-down list.
Under Assign access to, select User, group, or service principal.
Under Select, find and select the users or groups that you want to assign the role to. You can type in the Select box to search the directory for display name or email address.
Select Save to create the role assignment.
To assign the Contributor role using the Azure CLI or PowerShell, see Assign Azure roles using CLI or PowerShell.
Box 2: Assign the Storage Blob Data Contributor role to the team members.
A detailed explanation with references is as follows:
As mentioned in the scenario, the team members are unable to perform backups and restores of blob dat a. This indicates that they do not have sufficient permissions to access blob storage resources. To grant them permissions, you need to assign them an Azure role that allows read/write/delete permissions to blob storage resources.
Azure roles are roles that can be assigned to users, groups, or applications to manage access to Azure resources2. Azure roles are based on Azure role-based access control (Azure RBAC), which is an authorization system that provides fine-grained access management of Azure resources3. With Azure RBAC, you can control access to resources by creating role assignments, which consist of three elements3:
The security principal: The user, group, or application that you want to grant or deny access to the resource.
The role definition: The predefined or custom set of permissions that you want to grant or deny on the resource. For example, read, write, delete, backup, restore, etc.
The scope: The level at which you want to apply the role assignment. For example, at the management group, subscription, resource group, or individual resource level.
To assign an Azure role that allows read/write/delete permissions to blob storage resources, you can use the Storage Blob Data Contributor role. The Storage Blob Data Contributor role is a built-in role that has full access to blob storage resources except granting access to others1. This means that users who are assigned the Storage Blob Data Contributor role can perform backups and restores of blob data.
To assign the Storage Blob Data Contributor role using the Azure portal, follow these steps4:
In the Azure portal, navigate to the scope where you want to assign the role. For example, a storage account or a container.
Select Access control (IAM), then select Add > Add role assignment.
Under Role, select Storage Blob Data Contributor from the drop-down list.
Under Assign access to, select User, group, or service principal.
Under Select, find and select the users or groups that you want to assign the role to. You can type in the Select box to search the directory for display name or email address.
Select Save to create the role assignment.
To assign the Storage Blob Data Contributor role using the Azure CLI or PowerShell, see Assign Azure roles using CLI or PowerShell.
Question 9
You need to resolve the connectivity issue with the on-premises database named CosmosDB1.
What should you do? To answer, select the appropriate options in the answer area.
NOTE: Each correct selection is worth one point.
Correct answer: To work with this question, an Exam Simulator is required.
Explanation:
Box 1: Deploy an Azure virtual machine (VM) that hosts a DNS service.In the given scenario, CosmosDB1 is an on-premises database, and you need to make it accessible by host name using VNet1. To achieve this, you should deploy an Azure virtual machine that hosts a DNS service. This will allow you to configure custom DNS settings for VNet1, enabling the resolution of the on-premises database's host name. Reference: https://docs.microsoft.com/en-us/azure/virtualnetwork/ virtual-networks-name-resolution-for-vms-and-role-instances#name-resolution-that-usesyour- own-dns-server Box 2: Configure DNS conditional forwarding in the on-premises DNS infrastructure.In the given scenario, you need to resolve the connectivity issue with the on-premises database named CosmosDB1, and it must be accessible by hostname from the on-premises environment. To achieve this, you should configure DNS conditional forwarding in the on-premises DNS infrastructure. DNS conditional forwarding allows you to specify that DNS queries for a specific domain (in this case, the Azure Cosmos DB) are forwarded to a specific DNS server or set of servers. This ensures that the on-premises environment can resolve the hostname of CosmosDB1 by forwarding the DNS queries to the appropriate DNS server responsible for that domain. Reference: 1.https://docs.microsoft.com/en-us/previous-versions/windows/it-pro/windows-server-2003/cc782142(v=ws.10) 2. https://docs.microsoft.com/en-us/azure/private-link/private-endpointdns#on-premises-workloads-using-a-dns-forwarder Box 1: Deploy an Azure virtual machine (VM) that hosts a DNS service.
In the given scenario, CosmosDB1 is an on-premises database, and you need to make it accessible by host name using VNet1. To achieve this, you should deploy an Azure virtual machine that hosts a DNS service. This will allow you to configure custom DNS settings for VNet1, enabling the resolution of the on-premises database's host name. Reference: https://docs.microsoft.com/en-us/azure/virtualnetwork/ virtual-networks-name-resolution-for-vms-and-role-instances#name-resolution-that-usesyour- own-dns-server
Box 2: Configure DNS conditional forwarding in the on-premises DNS infrastructure.
In the given scenario, you need to resolve the connectivity issue with the on-premises database named CosmosDB1, and it must be accessible by hostname from the on-premises environment. To achieve this, you should configure DNS conditional forwarding in the on-premises DNS infrastructure.
DNS conditional forwarding allows you to specify that DNS queries for a specific domain (in this case, the Azure Cosmos DB) are forwarded to a specific DNS server or set of servers. This ensures that the on-premises environment can resolve the hostname of CosmosDB1 by forwarding the DNS queries to the appropriate DNS server responsible for that domain. Reference: 1.
https://docs.microsoft.com/en-us/previous-versions/windows/it-pro/windows-server-2003/cc782142(v=ws.10) 2. https://docs.microsoft.com/en-us/azure/private-link/private-endpointdns#on-premises-workloads-using-a-dns-forwarder
Question 10
You need to troubleshoot and resolve the reverse DNS lookup issues.
What should you do? To answer, select the appropriate option in the answer area.
NOTE: Each correct selection is worth one point.
Correct answer: To work with this question, an Exam Simulator is required.
Explanation:
Box 1: Verify that VNet1 is configured to use the built-in Azure resolution As mentioned in the scenario, you need to troubleshoot and resolve the reverse DNS lookup issues. Reverse DNS lookup is a process of resolving an IP address to a host name2. For example, if you have a virtual machine with an IP address of 10.0.0.4 and a host name of vm1.contoso.com, you can use reverse DNS lookup to find the host name from the IP address. One way to perform reverse DNS lookup in Azure is to use the built-in Azure resolution. The built-in Azure resolution is a feature that allows reverse DNS lookup (PTR DNS queries) for virtual machine IP addresses by default1. This feature works for both IPv4 and IPv6 addresses, and it supports both public and private IP addresses. The built-in Azure resolution uses the host name of the virtual machine as the reverse DNS record. To use the built-in Azure resolution, you need to configure your virtual network to use the default Azure-provided DNS servers. These are the DNS servers that are automatically assigned to your virtual network when you create it3. You can verify or change the DNS server settings of your virtual network using the Azure portal, PowerShell, CLI, or REST API. To verify that VNet1 is configured to use the built-in Azure resolution using the Azure portal, follow these steps:In the Azure portal, navigate to the Virtual Network resource. Select DNS servers under Settings. Check if Default (Azure-provided) is selected under DNS servers. If not, select it and click Save to apply the changes. After configuring your virtual network to use the built-in Azure resolution, you can test the reverse DNS lookup using tools such as nslookup or dig. For example, you can use the following command to perform a reverse DNS lookup for an IP address of 10.0.0.4: nslookup -type=PTR 10.0.0.4 The output should show the host name of the virtual machine that has that IP address.Box 2: Create an in-addr.arpa private DNS zone and link it to VNet1, VNet2, and VNet3.Reverse DNS lookup issues are related to resolving IP addresses to their corresponding hostnames. In the given scenario, the issue is with reverse DNS lookups for the resources in the three virtual networks. Creating an in-addr.arpa private DNS zone and linking it to VNet1, VNet2, and VNet3 would ensure that the reverse DNS lookups can be resolved correctly across all three virtual networks. Reference: 1. Azure Private DNS: https://docs.microsoft.com/en-us/azure/dns/privatedns- overview 2. Reverse DNS lookup in Azure: https://docs.microsoft.com/en-us/azure/dns/privatedns- reverse-public-ip Box 1: Verify that VNet1 is configured to use the built-in Azure resolution As mentioned in the scenario, you need to troubleshoot and resolve the reverse DNS lookup issues. Reverse DNS lookup is a process of resolving an IP address to a host name2. For example, if you have a virtual machine with an IP address of 10.0.0.4 and a host name of vm1.contoso.com, you can use reverse DNS lookup to find the host name from the IP address.
One way to perform reverse DNS lookup in Azure is to use the built-in Azure resolution. The built-in Azure resolution is a feature that allows reverse DNS lookup (PTR DNS queries) for virtual machine IP addresses by default1. This feature works for both IPv4 and IPv6 addresses, and it supports both public and private IP addresses. The built-in Azure resolution uses the host name of the virtual machine as the reverse DNS record.
To use the built-in Azure resolution, you need to configure your virtual network to use the default Azure-provided DNS servers. These are the DNS servers that are automatically assigned to your virtual network when you create it3. You can verify or change the DNS server settings of your virtual network using the Azure portal, PowerShell, CLI, or REST API.
To verify that VNet1 is configured to use the built-in Azure resolution using the Azure portal, follow these steps:
In the Azure portal, navigate to the Virtual Network resource.
Select DNS servers under Settings.
Check if Default (Azure-provided) is selected under DNS servers. If not, select it and click Save to apply the changes.
After configuring your virtual network to use the built-in Azure resolution, you can test the reverse DNS lookup using tools such as nslookup or dig. For example, you can use the following command to perform a reverse DNS lookup for an IP address of 10.0.0.4: nslookup -type=PTR 10.0.0.4 The output should show the host name of the virtual machine that has that IP address.
Box 2: Create an in-addr.arpa private DNS zone and link it to VNet1, VNet2, and VNet3.
Reverse DNS lookup issues are related to resolving IP addresses to their corresponding hostnames.
In the given scenario, the issue is with reverse DNS lookups for the resources in the three virtual networks. Creating an in-addr.arpa private DNS zone and linking it to VNet1, VNet2, and VNet3 would ensure that the reverse DNS lookups can be resolved correctly across all three virtual networks. Reference: 1. Azure Private DNS: https://docs.microsoft.com/en-us/azure/dns/privatedns- overview 2. Reverse DNS lookup in Azure: https://docs.microsoft.com/en-us/azure/dns/privatedns- reverse-public-ip
HOW TO OPEN VCE FILES
Use VCE Exam Simulator to open VCE files
HOW TO OPEN VCEX AND EXAM FILES
Use ProfExam Simulator to open VCEX and EXAM files
ProfExam at a 20% markdown
You have the opportunity to purchase ProfExam at a 20% reduced price
Get Now!